TUTORIAL: Cutaway Cards, Making the most out of my paper!

banner

Hello there, well what a summer we have had here in our tiny town.
Its been full of comings and goings and lots of craftiness.
Whilst making a few cards,
We thought it might be fun to try and make the very most out of our stash.
If you are anything like us, being hoarders crafters, You seem to have something of everything!
Believe us, it is very easy to get overwhelmed
and not know where to begin.
So lets start here!
B1

Just a few basic essential things needed here, although feel free to adapt as you wish!
We thought we would make two cards using just a few tools.

B2

We chose a pretty, sparkly, and  floral paper to base the card duo on.
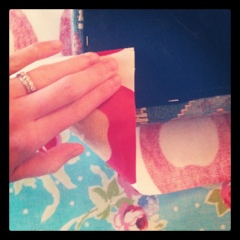
Cut the strip to the length of the card blank.
*Gently* fold in half to get the centre marker.

B3

Punch the first shape carefully.

HANDY HINT: Turn the “Window” of the punch upwards.
This is so you can be fully  in control of where you punch.

Repeat (we cut 3 butterfly shapes)

B4

This next step is if you fancy making the background paper on the card embossed.
We use our faithful BIG SHOT Die cutting system, however any brand will do the job!
Place the front of the card in the folder, close the folder
and sandwich the folder between two plastic plates.
Crank the handle and …. ROLL!

Embossing folder: swiss dots

b5

Next, take the plain strip of card and double side sticky tape the back.
(In the bottom corner you can see how the embossed effect looks.)

b6

Carefully stick the plain card down – cut off excess at the sides.
Now its an idea to lay the cutaway layer on top to make sure it works.
We made sure the plain strip was a little wider than the cutaway to make a pretty border.

b7

Stick the cutaway layer. (we used tape again)

Now we used a sparkly pen to add a few coloured spots for interest!

TA-DA!

b8

CARD #2

Using the “left over” butterfly shapes, we simply stuck some pop dots to the back,
embossed the cardstock…

b9

And stuck them down!
Super easy, no fuss or mess at all.

b10

Ta- da!

b11

There you have it two pretty, quick and thrifty cards!

If you are inspired by this, please leave a link to your experiments!
Enjoy….

Handmade Dreams are Made in Minch!
S and J x

Tutorial : Washi Tape Bunting Cake Topper


cake4


This is the perfect, quick way to add a little fun to any form of cake, pudding, icecream, pizza… just about anything.
Want to know the best part? You only need a few items that you very much are likely to have in your craft stash already.

0 11. Knot a length of paper twine onto a kebab stick.

22. Tie them both securely. 33. Cut a length of Washi Tape, lay it under the twine.

44. Fold the ends over and press together

5

5. Continue !
6

6. Carry on until you have created as many flags as you’d like.
77. Decide how you want to shape the flags. Traditional triangle flags or inverted (as above) are both effective.
89. Add them to whatever food, treat or cake you’d like to jazz up a little!

cake1

Our beautiful cake from Buttercup Baking.
Could not recommend Sally and her delicious dairy free Summer fruits and meringue butter cream frosted cake more!
Look out for a more in depth feature later on this week …
Happy Weekend!
Handmade dreams are Made in Minch

Instant cheer: oilcloth DIY

It is ferociously nasty outside today.
The rain is lashing, the wind is howling, so hunker down
Stick the kettle on and come and cheer up with some easy,quick fixes
for brightening up your home.

20120429-140435.jpg
PROJECT 1 Brighten up your kitchen table!

 We bought this gorgeous dark wood extendable table
and 4 chairs from Stroud Auctions for only a few pennies
20120429-141053.jpg
Add a pretty oilcloth table cloth
SHAZAAAAM!
Instant colour,
Pattern,
Life and cheeriness
hurrah for the Cath Kidston influence 🙂
20120429-141609.jpg

PROJECT 2
recovering an old cushion
>20120429-142319.jpg

Jazz up a tired chair. Use contemporary fabrics,
We used an apple print oil cloth

20120429-142325.jpg

20120429-142831.jpg
You will need
*Fabric /oilcloth
*seat pad
*scissors
*drawing pins/stapler

20120429-142838.jpg
First cut around the base of the seat cushion.
Remember to leave a decent border to accomodate
the depth of the cushion

20120429-142844.jpg
The corners are the most important part of the operation!
Do not underestimate them. Take your time.

20120429-142849.jpg
Pull the fabric tight against the 90 degree corner of the cushion.
Fold in the edges

20120429-142855.jpg
If in doubt, follow the upholstery corner made before in the old fabric

20120429-142901.jpg
Secure with a drawing pin
(if so desired repeat with a staple gun! Be careful!)

20120429-142908.jpg
Secure the 4 corners first.
Work along the sides
Pulling to smooth out as you go.

20120429-143009.jpg
Replace the seat pad and, ta da! all done!

20120429-143016.jpg

PROJECT 3 mix and match bunting.
Raid your fabric stash.
c’mon you KNOW you have the perfect remenant somewhere.
Whizz up a few flags out of your favourites
and you have some instant summer,
even in this most foul of Aprils!

Source: 500px.com via Stephane on Pinterest

Excuse us, now we are off to make more newborn presents…
it must be something in the water 🙂
Have a fabulous Sunday.
Handmade Dreams are Made in Minch
S+J x

M-i-m Tutorial : Cotton reel memo/photo holder : WASHI TAPE

http://www.etsy.com/shop/madeinminch

Hello Blog world 🙂
Welcome to our first Made in Minch tutorial- the perfect way to start your weekend!

We have been consistently asked about our little memo/photo holders whilst out on our stall.
They make lovely presents, surprises and name place holders for an afternoon tea party
(This is our favourite idea)
They are easy to make, and you don’t need very much!

* Wooden Cotton reels
* Washi Tape
* Round nosed Pliers
* Wire cutters
* Glue Gun
* Scissors
* Wire (Hard/Thicker if possible)

First of all choose the washi tapes with the best match for width of body of the cotton reel.

Carefully begin to stick the tape.
Try to make it as straight as you can, Don’t worry about resticking, Washi Tape peels and sticks back beautifully!
(Its why we *love* it!)
(You can always over lap the tapes  like we did – If you want to mix patterns)

Next, you need the wire.
With your roundnosed pliers twist the end to make a loop(s) (I made a double loop)
The loop needs to be small enough to fit in the hole of the cotton reel.
Then bend the wire just above the loop at a 90 degree angle so the loop forms a base.


Make sure the “base” fits into the cotton reel – We cant stress this point enough!

For the next step, decide how long you would like the memo holder to be and cut the wire.
Bend the top part of the wire with the round nosed pliers to make almost a paper clip shape.
 
Pop a little glue in the hole of the cotton reel.
Slide the “base” loop in to the reel hole and glue the top hole to secure.

Ta da! Slide a photo/memo into your clip and you are finished!

Now its a tough choice as to which tape to use!

Enjoy!
Handmade Dreams are Made in Minch
S+J x